
I was asked how to make a full sticker instead of a peeled sticker. Here is how you make a full sticker as well as one with transparent borders.
NOTE: I use Photoshop and the GetGlue Sticker Template for Photoshop. I do NOT use the PNG template, and I do NOT use gimp. Please do NOT ask me how to use gimp or the PNG template, however my daughter uses gimp and says that the process is pretty much the same.
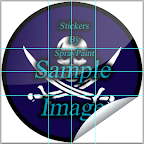
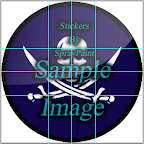
Step 1
Create your sticker layer(s) using the template once you have it set up how you want it should look something like this...
Step 2
Rasterize the "Sticker Elements" Blockout, Sheen & Fold, and Border Color. You must do this or you will have to edit each of these layers in Illustrator which can prove to be confusing if you have not worked with Illustrator before, easiest to just rasterize the layers.
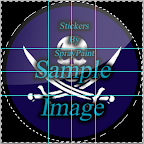
Step 3
Once you have the layers rasterized, Duplicate the Blockout layer and flip it some other way (horizontal or vertical). should look like this now...
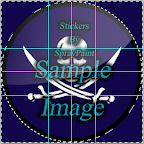
Step 4
Using the magic wand tool select the inside of the new blockout layer. Click on the old blockout layer and push the delete key. your image should now look like this...
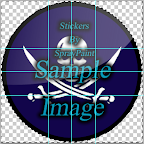
Step 5
Delete the new blockout layer. Or you can just hide it if you want... Should now look like this...
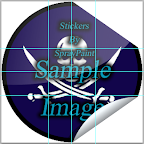
Step 6
Click on the Sheen & Fold layer, using the Eraser tool, erase the fold (peel)... now you get this...
STOP HERE If all you wanted was a Full Sticker, you can now save your sticker... Be sure to also save it as a PNG (Best quality) or JPeg (mid quality); you can also save it as a GIF but the quality is so poor due to the fact that you can only have a max of 256 colors and if you have more than that your image looks crappy. Don't forget to upload it for everyone else to see...
Continue on to make a Transparent Sticker (Skip steps 3, 4, 5, and 6 above if you want a peeled sticker)
Step 7
Click on the Blockout layer, using the magic wand tool select the outside portion of blockout layer. Hide the block out layer and you should see this...
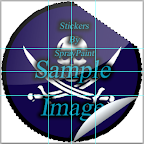
Step 8
Click on the Border Color Layer and push the delete key to delete the outside of the colored ring leaving just a thin border ring like this...
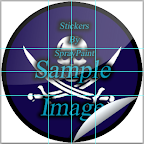
Step 9
Now clikc on each of your layers and push delete to clear the designs outside the colored border ring... like this
Now you have a Transparent border around the sticker... save you work then save it as a PNG (best quality) or GIF (poor quality as it only allows for 256 colors) either one allows for transparent images, anything else will result in a white border (and that was what we just removed). Don't forget to upload it for everyone else to see...
Here is a Video Going though the steps above
NOTE: I use Photoshop and the GetGlue Sticker Template for Photoshop. I do NOT use the PNG template, and I do NOT use gimp. Please do NOT ask me how to use gimp or the PNG template, however my daughter uses gimp and says that the process is pretty much the same.
Step 1
Create your sticker layer(s) using the template once you have it set up how you want it should look something like this...
Step 2
Rasterize the "Sticker Elements" Blockout, Sheen & Fold, and Border Color. You must do this or you will have to edit each of these layers in Illustrator which can prove to be confusing if you have not worked with Illustrator before, easiest to just rasterize the layers.
Step 3
Once you have the layers rasterized, Duplicate the Blockout layer and flip it some other way (horizontal or vertical). should look like this now...
Step 4
Using the magic wand tool select the inside of the new blockout layer. Click on the old blockout layer and push the delete key. your image should now look like this...
Step 5
Delete the new blockout layer. Or you can just hide it if you want... Should now look like this...
Step 6
Click on the Sheen & Fold layer, using the Eraser tool, erase the fold (peel)... now you get this...
STOP HERE If all you wanted was a Full Sticker, you can now save your sticker... Be sure to also save it as a PNG (Best quality) or JPeg (mid quality); you can also save it as a GIF but the quality is so poor due to the fact that you can only have a max of 256 colors and if you have more than that your image looks crappy. Don't forget to upload it for everyone else to see...
Continue on to make a Transparent Sticker (Skip steps 3, 4, 5, and 6 above if you want a peeled sticker)
Step 7
Click on the Blockout layer, using the magic wand tool select the outside portion of blockout layer. Hide the block out layer and you should see this...
Step 8
Click on the Border Color Layer and push the delete key to delete the outside of the colored ring leaving just a thin border ring like this...
Step 9
Now clikc on each of your layers and push delete to clear the designs outside the colored border ring... like this
Now you have a Transparent border around the sticker... save you work then save it as a PNG (best quality) or GIF (poor quality as it only allows for 256 colors) either one allows for transparent images, anything else will result in a white border (and that was what we just removed). Don't forget to upload it for everyone else to see...
Here is a Video Going though the steps above
No comments:
Post a Comment